Bimmerboard.com Tips:
iPod install tips
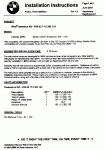
Make sure you get the parts guy to give you a copy of the BMW instructions. There is a note on the iPod cable box that instructs him to do so.
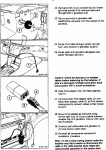
1. As far as I know, it is imperative that you have the Pin Removal Tool (pic-1) handy to perform this install. It is part #88-88-6-611-132. I think it costs anywhere from $35.00 to $55.00. It’s not much of a tool for that kind of cash…but entirely necessary.
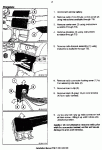
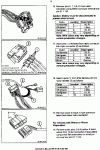
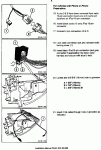
2. The included instructions are relatively easy to understand. They, however, leave out several steps and refer you to follow steps outlined in other BMW literature (not readily available).
3. Disconnect the battery first. If you cannot get past this, you will not be able to complete the iPod install task. The battery is in the trunk, on the right side. The cover can sometimes be tough to get out. After removing the 2 fasteners on the cover, lift it up in the front and rear at the same time. Wiggle it on out. Use a 10mm wrench to remove the ground cable (right side). Move the cable away from the battery and make sure it does not find its way back to the battery without your knowledge!
4. Follow the step as outlined in this link to remove the dash trim:
http://www.e46fanatics.com/howto/howtodetail.php?howto_id=25 STOP @ step 8!
5. Remove the 2 screws holding the radio in place (pic-2) and slide the radio out far enough to get to the radio connector. Pry up on the radio connector lock to release the connector from the radio. The lock must be lifted way up to fully release. Get your fingers under it and pull up harder than you think you should.
6. Pop off the antenna cable…pull it straight off (wiggle it a little if you have to).
7. Slide the radio all the way out and set it aside.
8. Take a correct sized slotted screwdriver and twist it in the slot (pic-3) on both sides of the climate control panel. It will come out far enough for you to work it on out. Disconnect the 4 wiring plugs. The large plug has a lock lever that must be lifted in order to unlock it. The 2 medium sized plugs have locking tabs that must be squeezed in order to remove them. The smallest connector is held by friction and should be carefully wiggled out. Remember the location of the 2 medium plugs…if you forget, they are color-coded.
9. Now!…the hard part. Removal of the top vent is necessary to allow removal of the bracket that supports the radio and the climate control. There may be a trick to the vent removal, but I couldn’t figure it out. There are locking tabs top and bottom (respectively pic-4/pic-5). I got it out by pushing up & out from the bottom right side until it was loose. I then reached inside and pulled outward and downward with one hand and pushed down from the outside with the other hand. This took a fair amount of manipulation. Do not put any pressure on the louvers as they may break. Once the top vent is free on the right side…just do the same procedure on the other side…it should be easier. Pull the vent out and lay it on top of the dash with the cable still attached. Do not remove the cable!
10. With the vent out of the way, remove any screws (2 of them, as I recall) holding the radio/climate control bracket in place (pic-6) and slide out the bracket being careful not to snag the wiring harnesses. Set it aside. Pull the radio connector out of the dash and take a good look at it. Remove the connector lock by carefully prying up on the tabs (pic-7) on either side of the lock and sliding it all the way off (pic-8). There is a blue plastic “lock” that you must remove in order to separate the 10-pin connector from the radio connector…use a small screwdriver and pry it up and pull it out (also pic-8). The 10-pin connector will come right out. Don’t worry, it goes right back in as easy as it came out. Next, with the same small screwdriver, carefully pry apart the radio connector and the connector wire lock.
11. Now comes the wiring part as explained in the BMW instructions. The instructions are very clear on what to do. Follow them to the letter and do not get any wires crossed up. The numbers on the radio connector are a bit difficult to read without good lighting. So make sure you have a good flashlight handy…and maybe even a magnifying glass. The BMW instructions have a good illustration as to which wires to pull…so feel free to use that as reference. You will make the job of separating the connector pin lock from the connector if you peel back the cloth tape (pic-9) covering the wires leading to the connector. This allows the wire lock to slide farther up the wires. Note the open connector (pic-11). Carefully cut the tape and peel it back about 1-2 inches. You can re-tape it when you are done.
12. If you do not have the pin removal tool at this point…put everything back in the reverse order, and go get one. The pin removal tool is utilized by pushing the pin remover into the face of the connector right over the female pin. You may feel a snap as the pin is released. You should be able to pull the wire right out of the back of the connector (pic-9/pic-10).
13. A generic pin removal tool might be obtained from an electronics store (NOT Radio Shack)…a REAL electronics store. It must fit precisely, or it will not work.
14. Most BMW E46s are phone ready, so follow the instructions as they are spelled out concerning the 2 wires (1-black & 1-yellow) on the 10-pin connector (pic-12). They can be easily removed with a jeweler’s screwdriver …an extra hand may help by gently pulling these 2 small wires (one at a time of course) while you hold the connector and press the indicated area (pic-12).
15. Removal of the glove box involves the removal of numerous screws, some (as I recall) requiring a stubby screwdriver. I actually removed the box from the carrier and then removed the carrier. I think that it can be removed as a complete unit, but I did not investigate this. I do know that two backwards-protruding tabs hold the top front of the box. If you pull down on these, they will break. So, after you are sure all of the screws are out, lift up slightly and pull toward you to remove the box assembly from the dash. You can use a ½” drill bit to drill the 5/8” hole…just apply additional pressure with the bit around the circumference of the hole. Carefully do this until 5/8” is achieved.
16. That’s it!…follow the directions provided by BMW from there. It all goes back easier than it came apart…just be careful about the position of the wiring harnesses while reassembling
17. Remember, your iPod will not be recognized unless your playlists begin with: BMW1, BMW2, BMW3, etc. You can add any description you want after the “BMW1”. Example: BMW1favorites, BMW2wifestuff…etc.
These notes are only in addition to the directions provided by BMW in order to correctly install your iPod Interface. They are as accurate as I can make them. I reserve the right to take NO responsibility for any damage, consequential or otherwise, to your car as a result of your using these notes during installation of your iPod. In other words…you are on your own…taking your own risks. Have fun & Good Luck! If you have any questions…email me @
oscarmayer@cox.net
![Stick Out Tongue [:p] [:p]](/images/smilies/tongue.png) ) i'm now leaning 90% dealer work, 10% diy.. thanks for the input tho, i wish i could've made better use of it. that $35-$50 pin removal part really was the straw that broke the camel's back.
) i'm now leaning 90% dealer work, 10% diy.. thanks for the input tho, i wish i could've made better use of it. that $35-$50 pin removal part really was the straw that broke the camel's back.